 AJCloud Docs
Set up the Camera — Plan B (Soft-AP)
Connect your camera to Wi-Fi using its own hotspot (Soft-AP) connection.
Plan B connects the camera through its own Wi-Fi hotspot. Use it if the Bluetooth method does not work for you.
Select the Device's Hotspot
In the AJCloud app, choose the device type and the Wi-Fi connection by Soft-AP setup mode, then connect your phone to the device's hotspot. The hotspot name starts with AJCxxx.
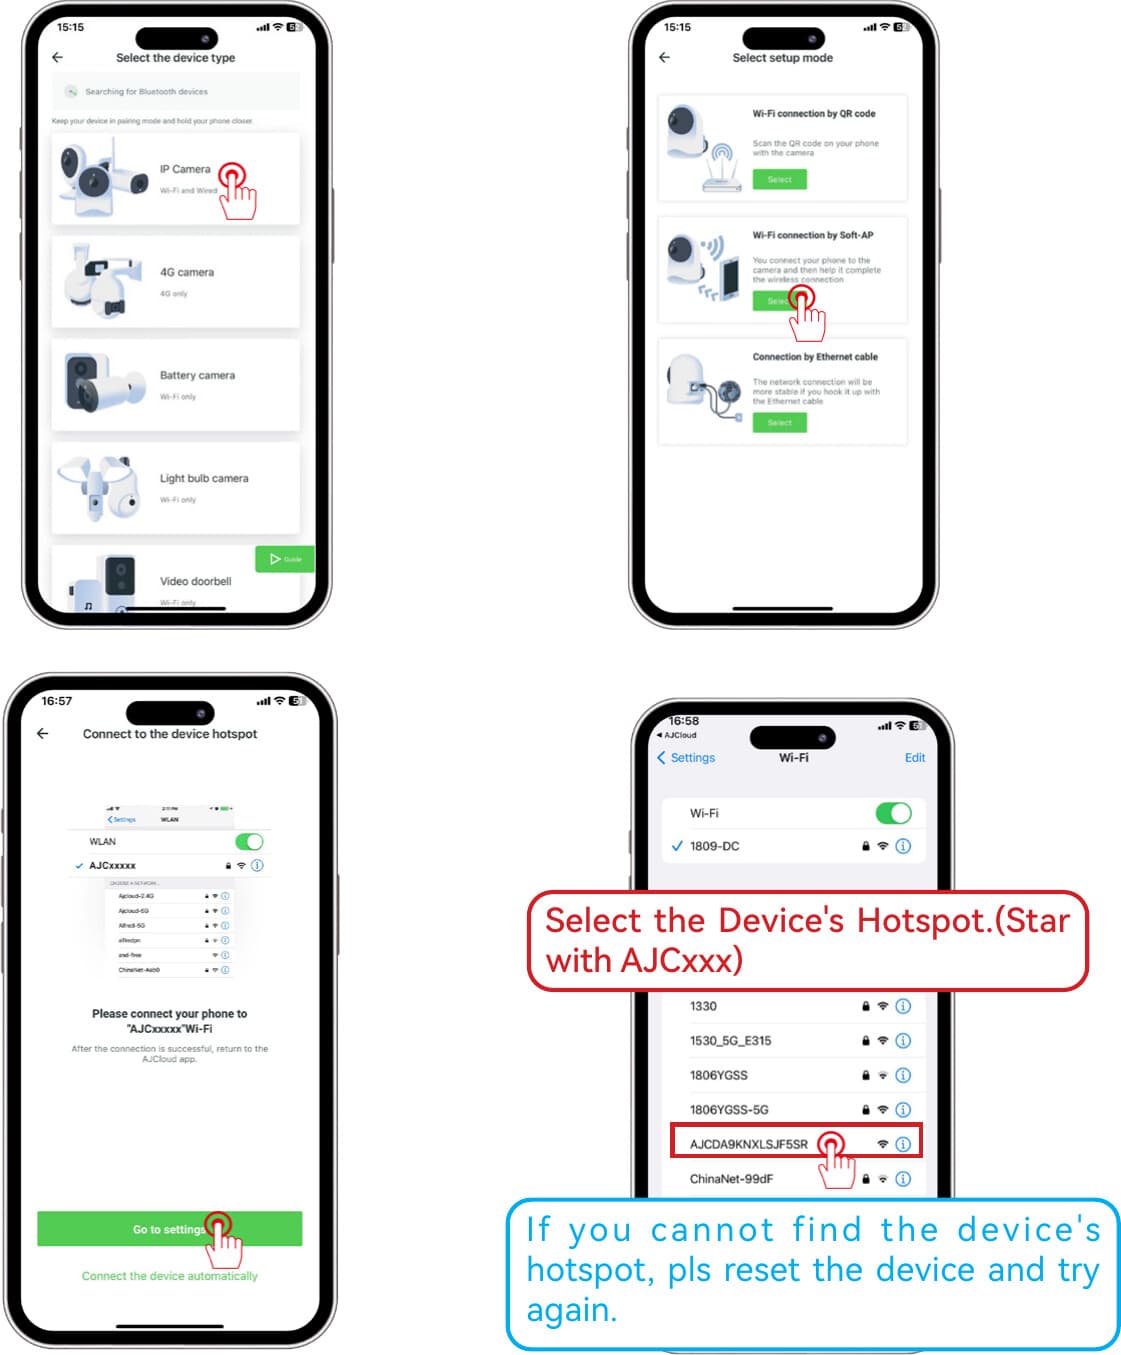
If you cannot find the device's hotspot, reset the device and try again.
Return to the App
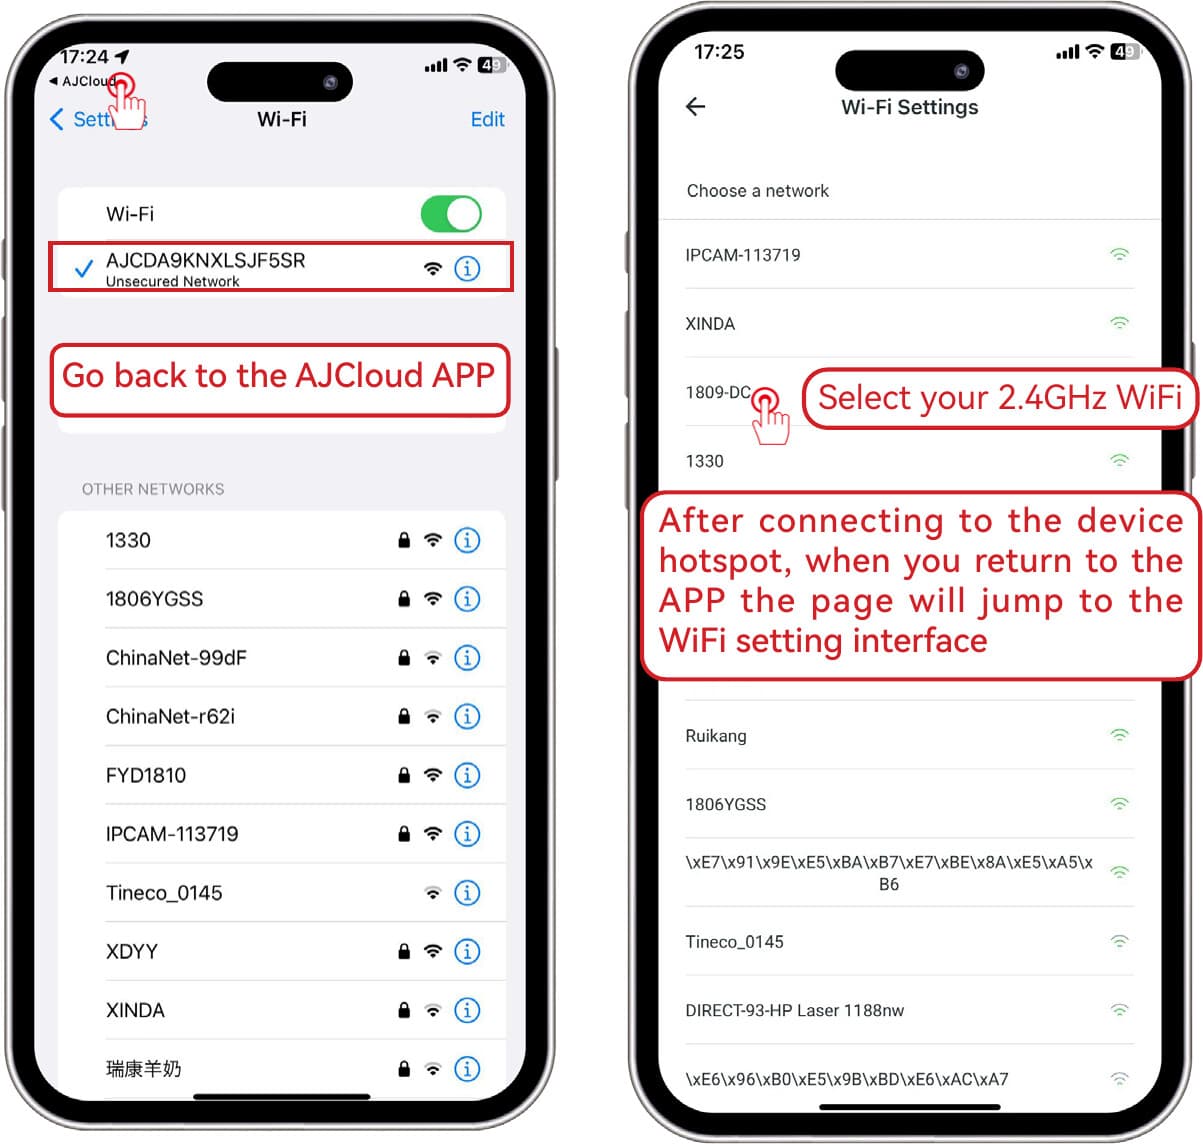
After connecting to the device hotspot, return to the AJCloud app — the page automatically jumps to the Wi-Fi setting interface. Select your 2.4 GHz Wi-Fi network.
Connect to Wi-Fi
Select your Wi-Fi network and enter your Wi-Fi password.
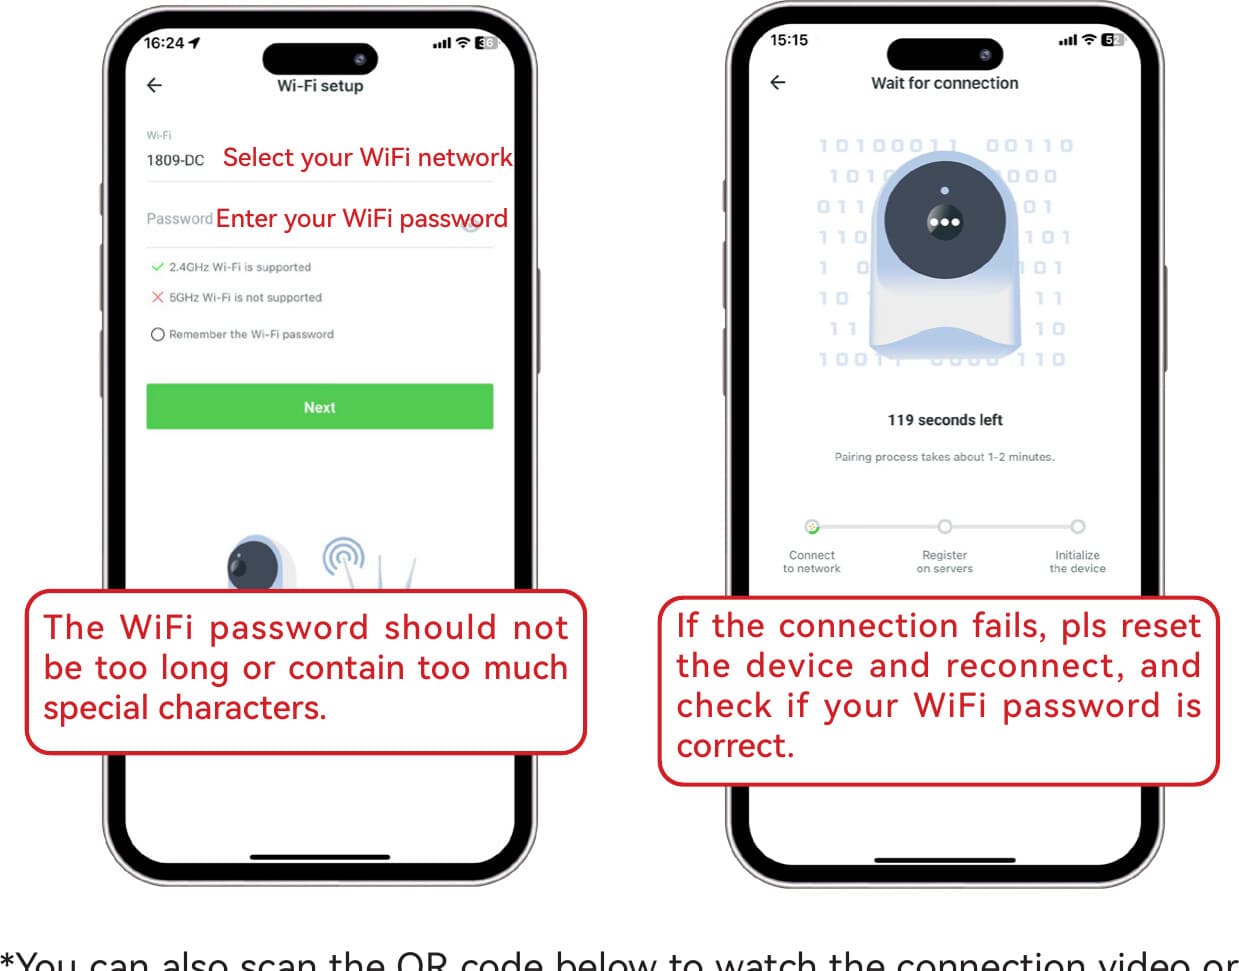
The Wi-Fi password should not be too long or contain too many special characters.
If the connection fails, reset the device and reconnect, then check that your Wi-Fi password is correct. For more help, you can contact our online customer service.