 AJCloud Docs
Camera Introduction
Power on your camera and reset it before connecting, plus TF card recommendations.
Step 1: Turning on the Camera
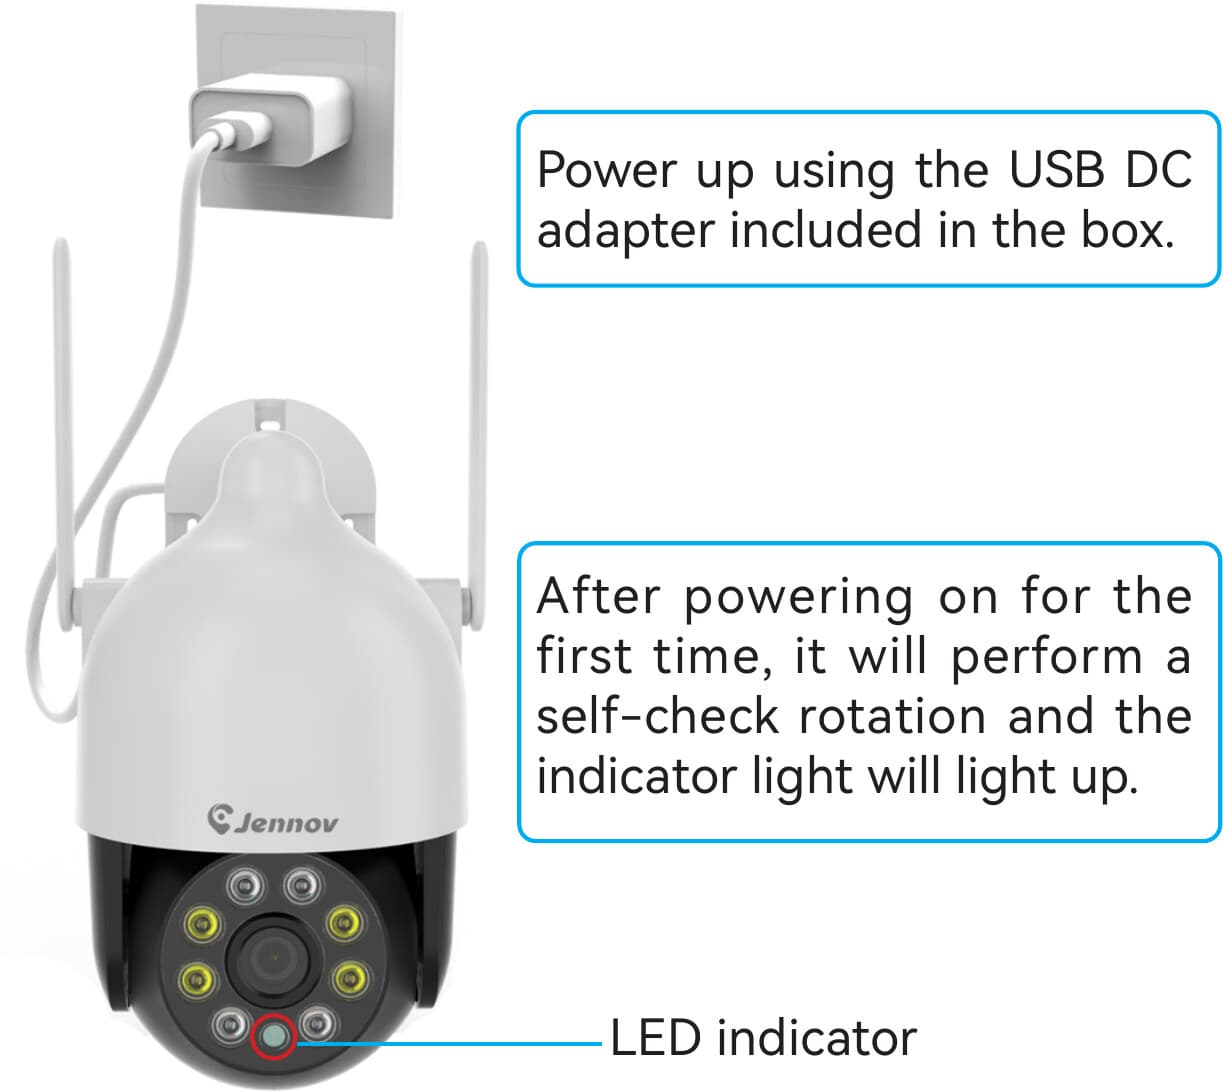
Power up the camera using the USB DC adapter included in the box.
After powering on for the first time, the camera performs a self-check rotation and the indicator light turns on.
Step 2: Resetting the Device
Press and hold the reset button for 8–10 seconds before connecting the camera, then wait a few seconds for the voice prompt.
After a successful reset, the device performs a self-check rotation and the indicator light flashes.
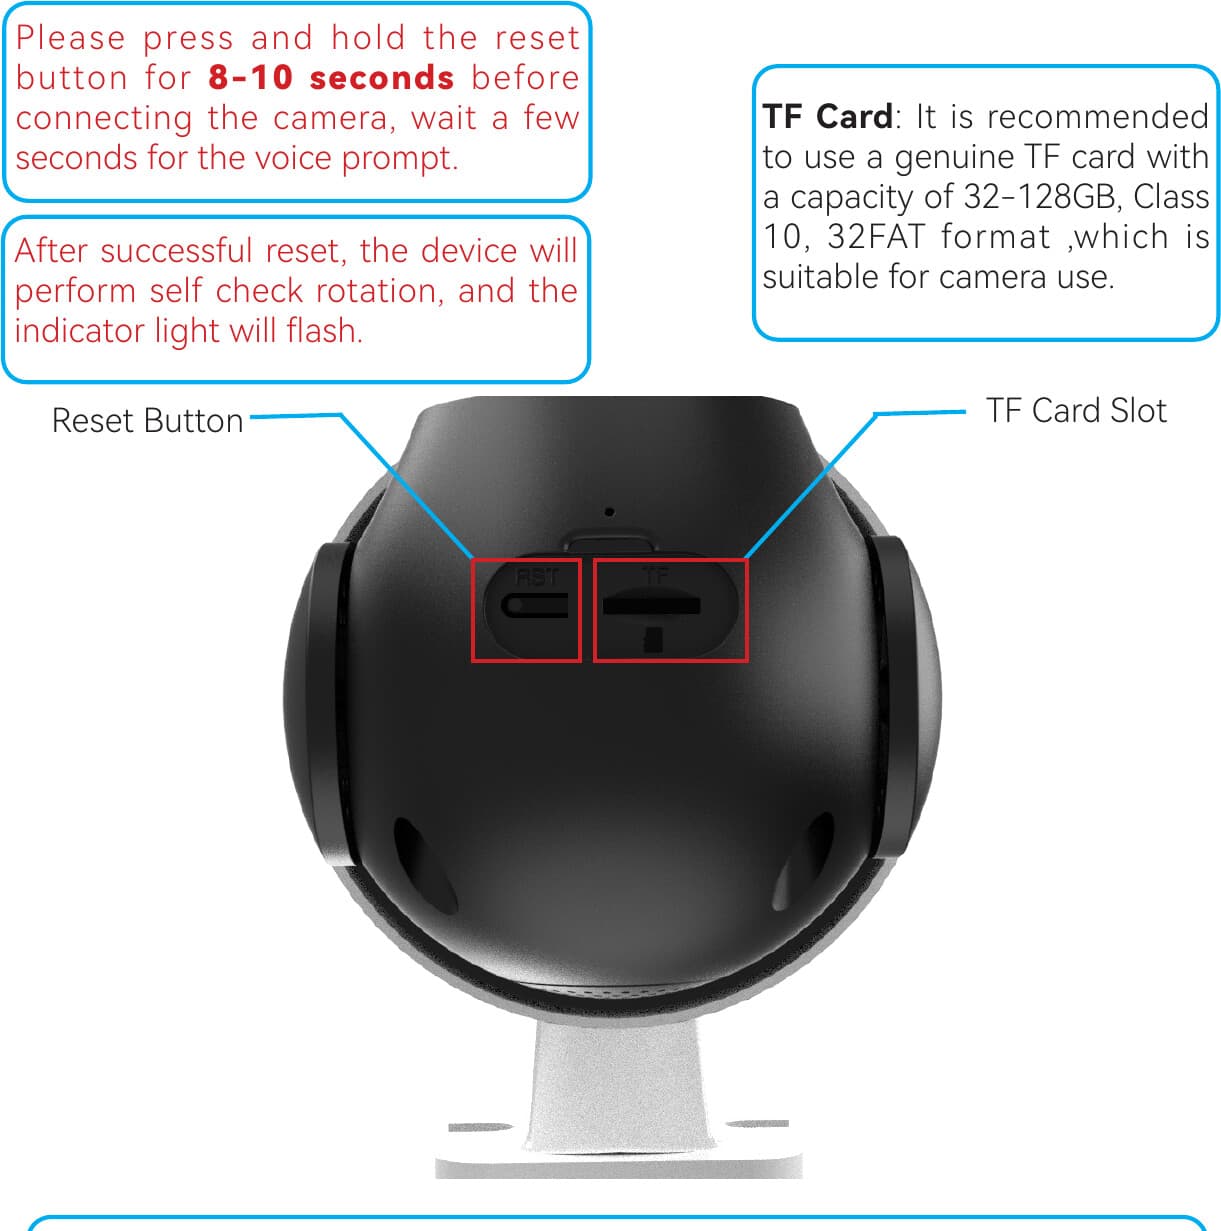
TF Card: A genuine TF card with a capacity of 32–128 GB, Class 10, FAT32 format is recommended for camera use.
Please reset the device before each reconnection. For the initial connection, it is recommended to place the device near the router.